Configuring issue responses:
An 'issue response' is an action that occurs when an issue is detected and a report is generated. It can do anything from dim your lighting in your house, to sending a notification to your server's Slack telling you the server has crashed and the cause.
Default responses:
- The Archive (Issue Log) - Logs issues and thread dumps
- If This Then That (Notifications) - Can send emails, SMS, dim your lights, etc...
- Slack (Notifications) - Can notify you and your team of issues and their cause
- Custom Web Hook - Allows you to submit (Via POST request) an issue report to your own website to handle as you wish.
- Create your own - Create your own response using the API
The Archive (Issue Log):
'The Archive' is a log of issues and also manually invoked thread dumps. By default it will write the logs to the plugin folder, although this can be changed and the issue logs can even be inserted into a database. Config file: 'archiveConfig.yml'
| Config Key | Default Value | Description |
|---|---|---|
| filesystem: path | <Server Directory>/plugins/ServerAssistant/Report Archive | This is where, if filesystem is used, logs of issues are saved to. This can be any directory on the machine. |
| filesystem: useFileSystem | true | If this is true, issues are logged to the file system in the path specified. |
| saveJSONCopyOfReport | false | If this is true then a JSON representation of the reported event is also saved. This allows other applications to extract specific data from the reports. (Eg. for analysing statistics) |
| database: useDatabase | false | If this is true, issues are logged to the SQL database specified. |
| database: name | serverAssistantDB | This is the name of your database |
| database: host | localhost | This is the host of your database, eg. localhost:3306 |
| database: user | user | This is the username of the user to login to your database via |
| database: pass | pass | This is the password of the user to login to your database via |
| isEnabled | true | If this is true, then the archive will be enabled and logging reports. |
If This Then That (Notifications):
'If This Then That' (ifttt.com) is a website you can configure to perform actions in response to an event. For example, you can dim your lights when your server lags or (more helpfully) send an email. Config file: 'ifThisThenThatConfig.yml'
Setting up 'If This Then That':
- Login to or setup a free 'If This Then That' account. You can do that by visiting this page.
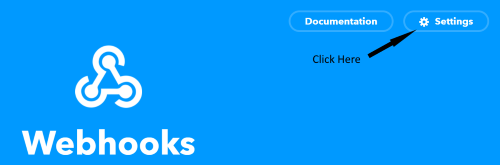
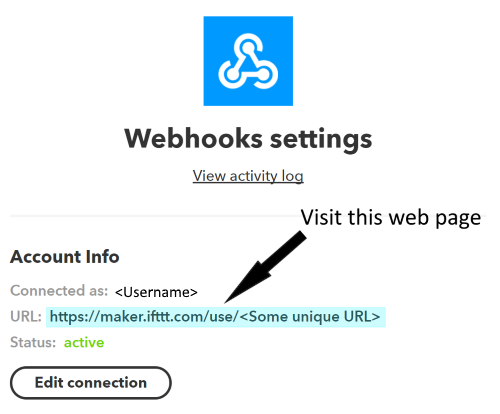
- Find out your 'maker channel key'. Do that by going to ifttt.com/maker_webhooks, clicking 'Settings', visiting the web page at the provided URL and then taking a note of the key it says
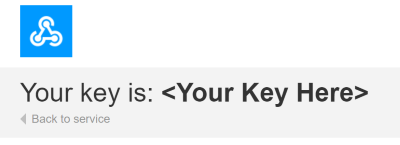
- Put your maker channel key into the config
- Create a new applet at https://ifttt.com/create
- Click on 'This'
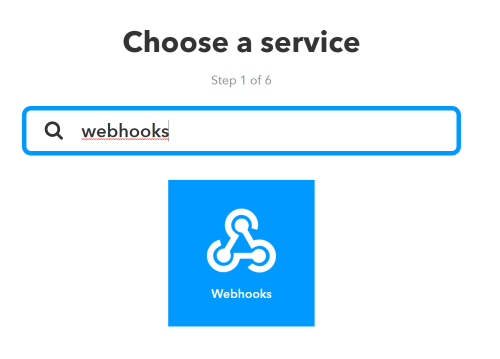
- Select the service 'Webhooks'
- Choose the 'Receive a web request' trigger
- Make the Event Name the EventID as listed in the config
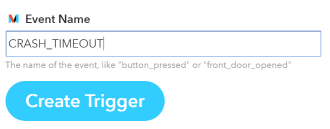
- Click 'Create Trigger'
- Click on 'That'
- Select the Action Channel of choice. For example 'gmail'
- Select an Action of your choice. For example, 'Send an email'
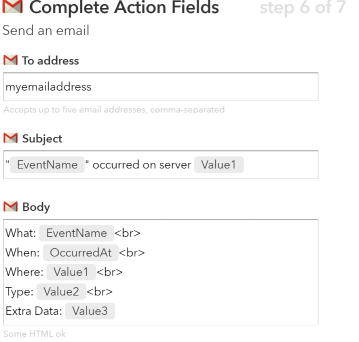
- Complete the Action Fields as you desire. The following parameters may be used
- {{EventName}} - The EventID of the issue
- {{OccurredAt}} - When the event occured
- {{Value1}} - The name of the server
- {{Value2}} - The type of issue. Eg. LAG, CRASH or CUSTOM
- {{Value3}} - The detailed report of the issue. For example timings data, a thread dump, tps, etc...
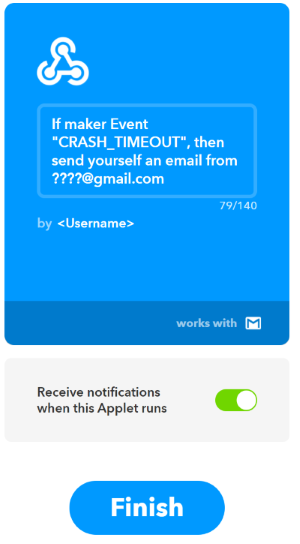
- Click 'Create Action' and then 'Finish'
- Make sure to test that your applet works. You can use '/crashserver' (Will only test freeze crashes) or '/lagserver' in game to do this
Configuring 'If This Then That':
| Config Key | Default Value | Description |
|---|---|---|
| makerChannelKey | N/A | This is the key to use with IFTTT for the maker channel. For information on how to setup IFTTT click here |
| useHTMLForNewLine | true | If this is true, lines in the issue report are separated via HTML (Eg. for emails), if false the newline character will be used. |
| listenedEventIDs | CRASH_HARD, CRASH_TIMEOUT, LAG_COMBINED, ERROR, CUSTOM | Lets you specify which event IDs this will respond to. If you want to respond to a custom event, add it's EventID here |
| isEnabled | false | If this is true, then the IFTTT will be enabled. |
Slack (Notifications):

Slack is a messaging app for teams and is used by many big minecraft servers. Server Assistant allows you to send notifications to slack when issues occur, and their cause Config file: 'slackConfig.yml'
Setting up a Slack hook:
- Navigate to https://<Your Team Name>.slack.com/apps/A0F7XDUAZ-incoming-webhooks
- Click 'Add Configuration'
- Configure the webhook. You can ignore the 'Post To Channel' part as it is overriden in the config
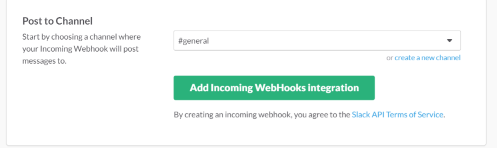
- Click 'Add Incoming WebHooks integreation'
- Copy the 'Webhook URL' it gives you into the config (slackbotHookURL)
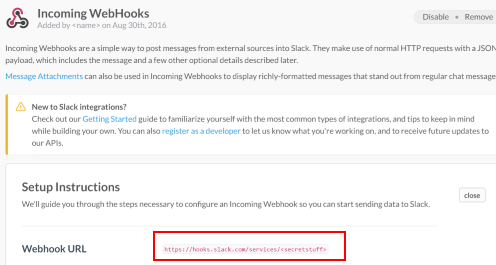
- Scroll down and click 'Save Settings'. The config will override much of what is configurable here.
- Test that your Slack hook is working. You can use '/crashserver' (Will only test freeze crashes) or '/lagserver' in game to do this
Configuring a Slack Hook:
| Config Key | Default Value | Description |
|---|---|---|
| slackbotHookURL | N/A | The URL of the webhook to communicate with slack via. For information about setting up the slack hook, see here |
| slackbotChannel | server-assistant | The slack channel to post to |
| botName | Server Assistant | The name of the bot as it will appear on slack |
| botIconEmoji | :warning: | The icon of the bot on slack |
| listenedEventIDs | CRASH_HARD, CRASH_TIMEOUT, LAG_COMBINED, ERROR, CUSTOM | Lets you specify which event IDs this will respond to. If you want to respond to a custom event, add it's EventID here |
| isEnabled | false | If this is true, then the slack hook will be enabled |
Custom Webhook:
With the custom webhook action, you can submit an issue report (via a JSON formatted POST request) to your own website to handle as you wish. Config file: 'customPostWebhookConfig.yml'
Setting up a Custom Webhook:
- Create a page on your website to submit the report to. Eg. 'https://mywebsite.com/issueReport'. For this it may be a good idea to add a URL parameter like an 'API Key' so that not everybody in the world can POST an issue report.
- Set the URL to POST the issue report to in the config
- Setup your website to read the contents of the POST request as a JSON message and perform subsequent actions with. The POST request is generated by turning the report object directly into JSON. The request might look similar to this:
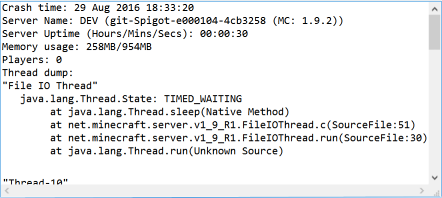
{
  "serverName": "DEV",
  "eventID": "CRASH_TIMEOUT",
  "report": {
    "details": [
      "Thread dump:",
      "<Line 1 of thread dump>",
      "<Line 2 of thread dump>"
    ],
    "usedMemoryMB": 259,
    "maxMemoryMB": 954,
    "playerCount": 0,
    "time": 1472471015147,
    "serverUptime": 0,
    "nature": "CRASH_TIMEOUT",
    "eventID": "CRASH_TIMEOUT"
  }
}
Since the conversion from Report->JSON is done automatically, it will also work with custom reports.
Configuring Custom Webhook:
| Config Key | Default Value | Description |
|---|---|---|
| hookURL | N/A | This is the URL to POST the report information to |
| listenedEventIDs | CRASH_HARD, CRASH_TIMEOUT, LAG_COMBINED, ERROR, CUSTOM | Lets you specify which event IDs this will respond to. If you want to respond to a custom event, add it's EventID here |
| isEnabled | false | If this is true, then the custom web hook will be enabled |